Appearance
Laravel 12 Project
After setting up your work environment, you're ready to create your first application. The fastest way to do this is by using the Laravel CLI, which is bundled with Herd.
In this chapter, we will start a new Laravel 12 project that will become our vinyl shop website. We'll begin with a fresh installation and then add a few key packages to build out its features. The primary tool we'll use is the * Livewire starter kit*, which provides a complete authentication system (login, registration, profile management) built with Livewire components and styled with Tailwind CSS. This allows us to create interactive, dynamic interfaces without writing complex JavaScript.
We will also install the Intervention Image package, a powerful PHP library that will help us handle image uploads and manipulations for our record covers.
Create a New Laravel 12 Project
Let's begin by creating the project itself using the tools provided by Herd.
IMPORTANT
Don't use uppercase letters, spaces, or special characters in the project name! This can cause problems with SSL certificates when you want a secure connection (https) for your websites.
Create the project with Herd
- Open Herd and select Sites in the sidebar.
- Click on Add, select New Laravel Project, and click on Next.
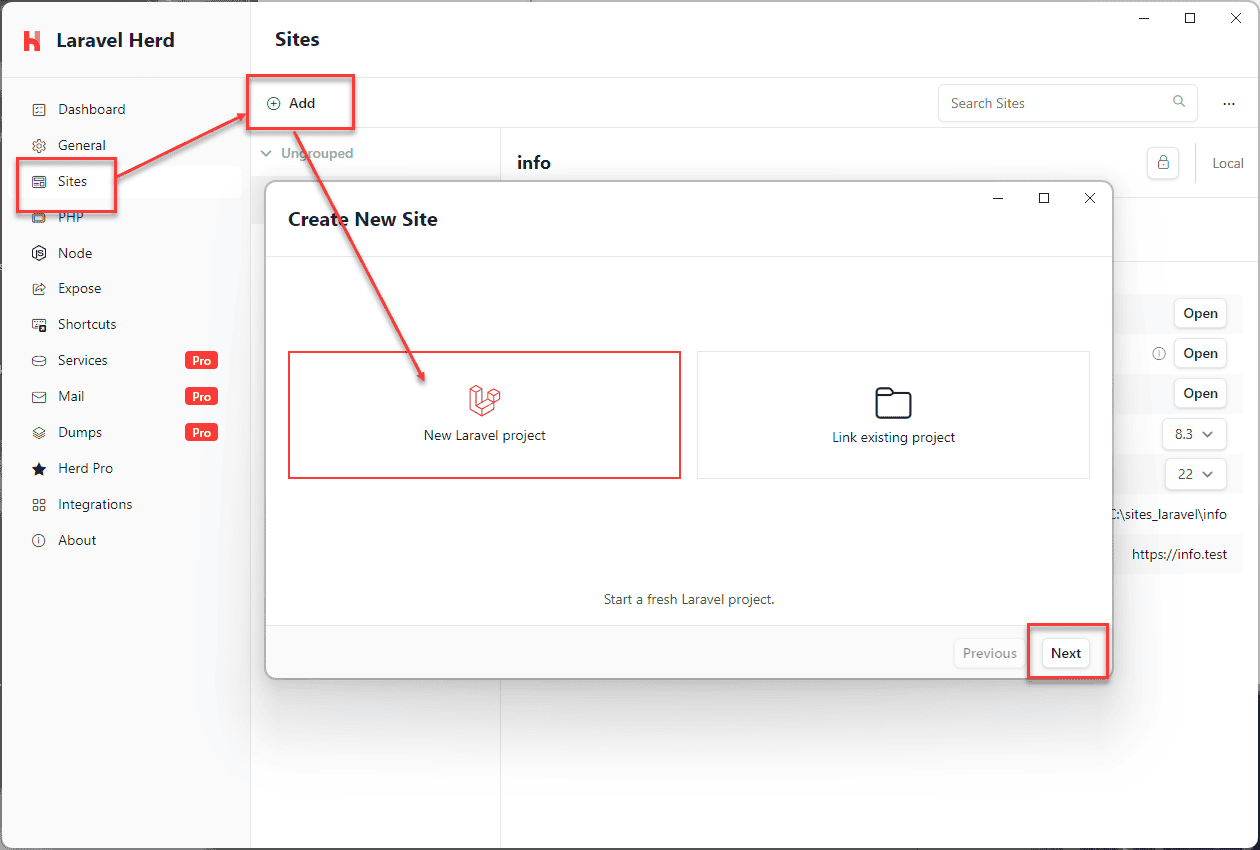
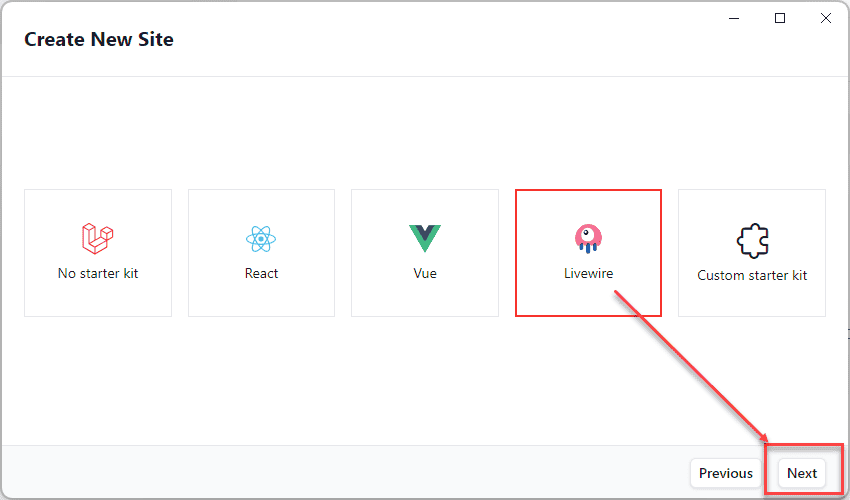
- Select Livewire as the starter kit and click on Next.
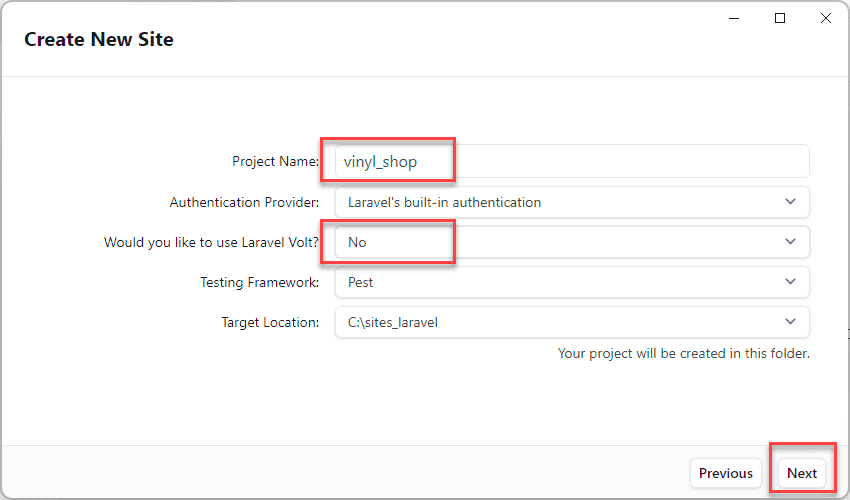
- Use the following settings for the new project:
- Project Name: vinyl_shop
- Authentication Provider: Laravel's built-in authentication
- Would you like to use Laravel Volt: No
- Testing Framework: Pest
- Target Location: C:\sites_laravel
- After the project has been created, close the modal window.
- Make the site secure by clicking on the lock icon next to the site name. This will configure an SSL certificate for you.
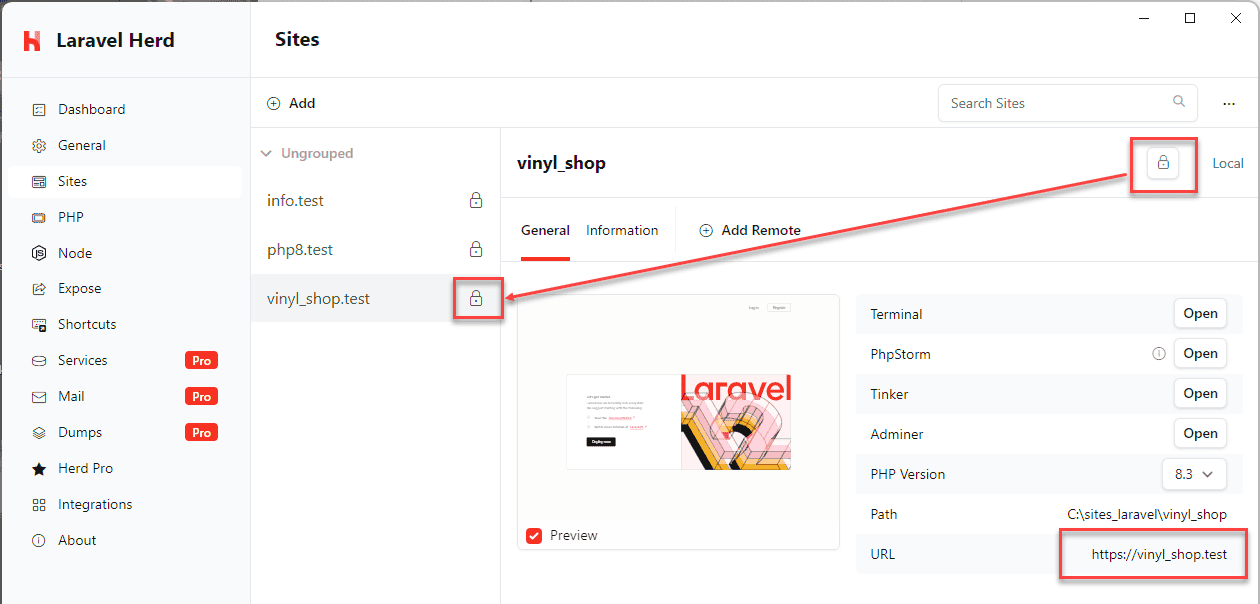
You can now open the site in your browser by clicking the URL in Herd or by navigating to http://vinyl_shop.test. You should see the Laravel welcome page with Login and Register links at the top right. 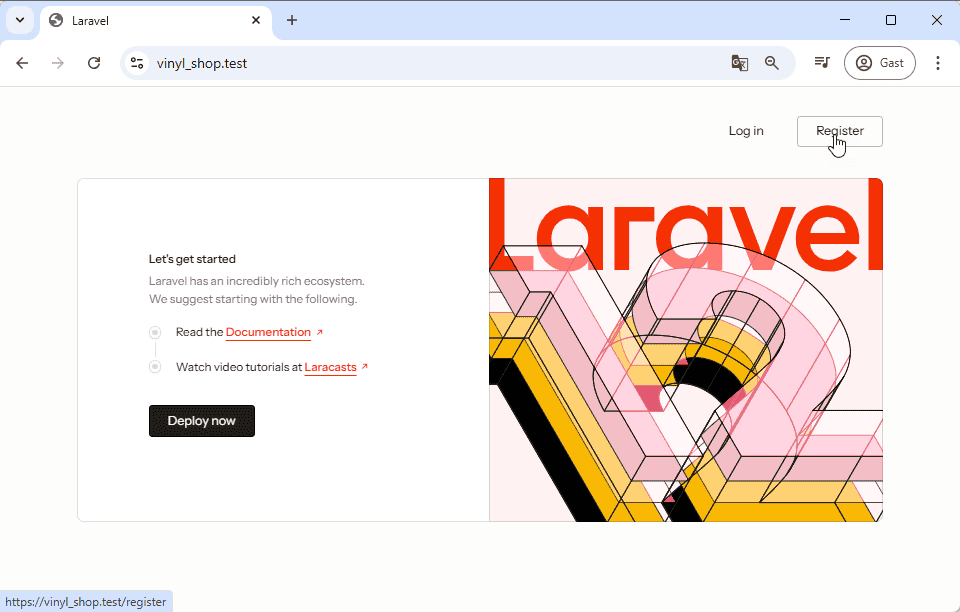
Initial Project Configuration
With the project created, the next steps are to open it in your IDE (PhpStorm) and perform some essential one-time configurations.
First, open the project folder C:\sites_laravel\vinyl_shop in PhpStorm. Wait for the IDE to finish indexing your project files (you can see the progress in the bottom-right corner of the editor). Once indexing is complete, ensure your project is configured to use PHP version 8.3. 
Configure Environment Variables (.env)
The .env file in the root of your project contains all the environment-specific settings. Open this file and make the following changes:
- Change APP_NAME to
"The Vinyl Shop". The quotes are required because the value contains spaces. - Change APP_URL to
https://vinyl_shop.testto match the secure URL you configured in Herd.
php
APP_NAME="The Vinyl Shop"
APP_ENV=local
APP_KEY=base64:NSKiPfWcKekv2PxLEnJO3xl7JCKmyEt5E881v1EPrnA=
APP_DEBUG=true
APP_URL=https://vinyl_shop.test- Change the SESSION_DRIVER from
databasetofile. For local development, the file driver is simpler and requires no database setup for sessions.
php
SESSION_DRIVER=file        // change from 'database' to 'file'
SESSION_LIFETIME=120
SESSION_ENCRYPT=false
SESSION_PATH=/
SESSION_DOMAIN=null- Configure your mail settings to use Mailpit, which runs on port
1025.- Change MAIL_MAILER from
logtosmtp. - Change MAIL_PORT from
2525to1025. - Update MAIL_FROM_ADDRESS to an appropriate email, like
info@vinyl_shop.test.
- Change MAIL_MAILER from
php
MAIL_MAILER=smtp            # change from log to smtp
MAIL_SCHEME=null
MAIL_HOST=127.0.0.1
MAIL_PORT=1025              # change from 2525 to 1025
MAIL_USERNAME=null
MAIL_PASSWORD=null
MAIL_FROM_ADDRESS="info@vinyl_shop.test"   # replace "hello@example.com" with your mailadres e.g. "info@vinyl_shop.test"
MAIL_FROM_NAME="${APP_NAME}" # or your name here e.g. "John Doe"REMARK
If your changes to the .env file don't seem to take effect, clear the configuration cache by running php artisan optimize:clear in the terminal.
Create Storage Symlink
Laravel uses the storage/app/public directory to store user-uploaded files. To make these files accessible from the web, you need to create a symbolic link (symlink) from public/storage to that directory. This will allow you to access uploaded record covers via URLs like https://vinyl_shop.test/storage/covers/xxxx.jpg.
Run the following Artisan command in the terminal to create the symlink:
sh
php artisan storage:linkInstall Additional Packages
Now that our base application is configured, we can install the extra packages needed for our vinyl shop.
Intervention Image
Intervention Image is an open-source PHP image handling library that we will use to process uploaded record covers.
- Install the package using Composer:
sh
composer require intervention/image-laravel- Publish the package's configuration file so you can customize its settings later:
sh
php artisan vendor:publish --provider="Intervention\Image\Laravel\ServiceProvider"Localization (optional)
INFO
This section is optional. Only follow these steps if you want to build a non-English or multilingual website.
The laravel-lang package provides community-maintained translations for Laravel.
- Install the package for common translations:
sh
composer require laravel-lang/common- Next, publish the default (English) language files and then add the languages you need. For example, use nl for Dutch, fr for French, or de for German.
sh
php artisan lang:publish
php artisan lang:add nlAfter running these commands, you will find a new lang directory in your project's root.
- To keep your language files updated automatically, open composer.json and add the
@php artisan lang:updatecommand to thepost-update-cmdscripts:
json
{
  "scripts": {
    "post-update-cmd": [
      "@php artisan lang:update",
      "@php artisan vendor:publish --tag=laravel-assets --ansi --force"
    ]
  }
}For more details, see the Config -> Localization section.
Configure Your Development Environment
To make development smoother, let's configure PhpStorm and install some helpful browser extensions.
Configure PhpStorm
Laravel Idea plugin
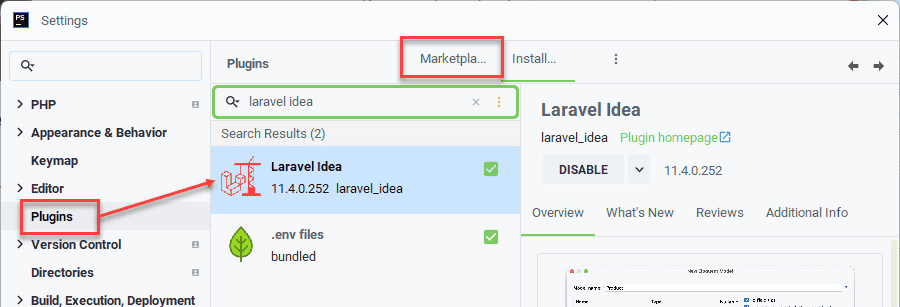
The Laravel Idea plugin provides superior code completion for Laravel-specific features like routes, models, and views, significantly improving on PhpStorm's built-in support.
- Go to File -> Settings -> Plugins and select the Marketplace tab.
- Search for and install the Laravel Idea plugin.
- After installation, generate the helper code by navigating to Laravel -> Generate Helper Code....
Alpine.js plugin
Alpine.js is a minimal JavaScript framework that lets you add behavior directly in your HTML markup. It's made by the creator of Livewire and works perfectly with it. The Alpine.js Support Plugin adds code completion for it in PhpStorm.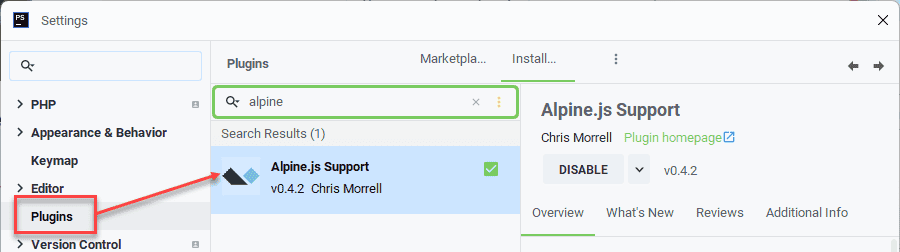
- In the plugin marketplace, search for and install the Alpine.js Support plugin.
Set (Git) bash as the default terminal
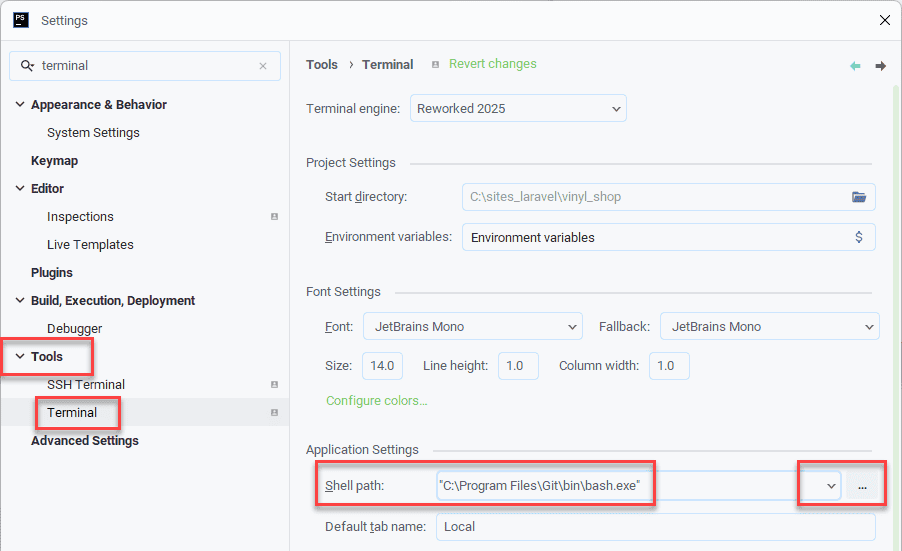
Using the Git Bash terminal within PhpStorm makes it easy to see which Git branch you are currently working on.
- Go to File -> Settings -> Tools -> Terminal.
- In the Shell path dropdown, select bash.exe.
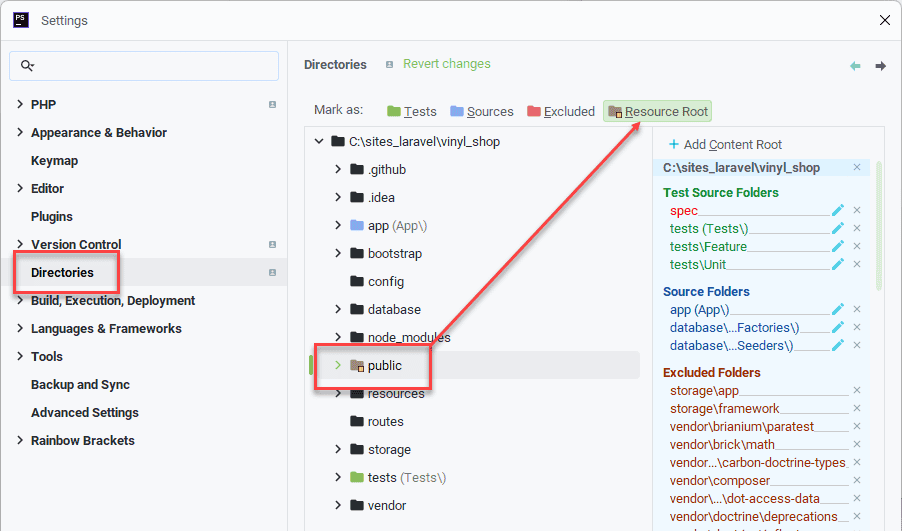
Add the public directory as a resource root
Marking the public directory as a "Resource Root" helps PhpStorm provide better code completion for static assets like images and CSS files.
- Go to File -> Settings -> Directories.
- Select the public directory and click on Resource Root.
- Click Apply and then OK.
Auto-start the servers
You can configure PhpStorm to automatically start the Vite development server and Mailpit every time you open the project.
- Go to File -> Settings -> Tools -> Startup Tasks.
- To add the development server:
- Click the + icon and choose npm.
- Name it dev server and select dev from the Script dropdown.
- To add the mail server:
- Click the + icon and choose Shell Script.
- Name it mail server.
- Select the Script text radio button and enter
mailpitas the script.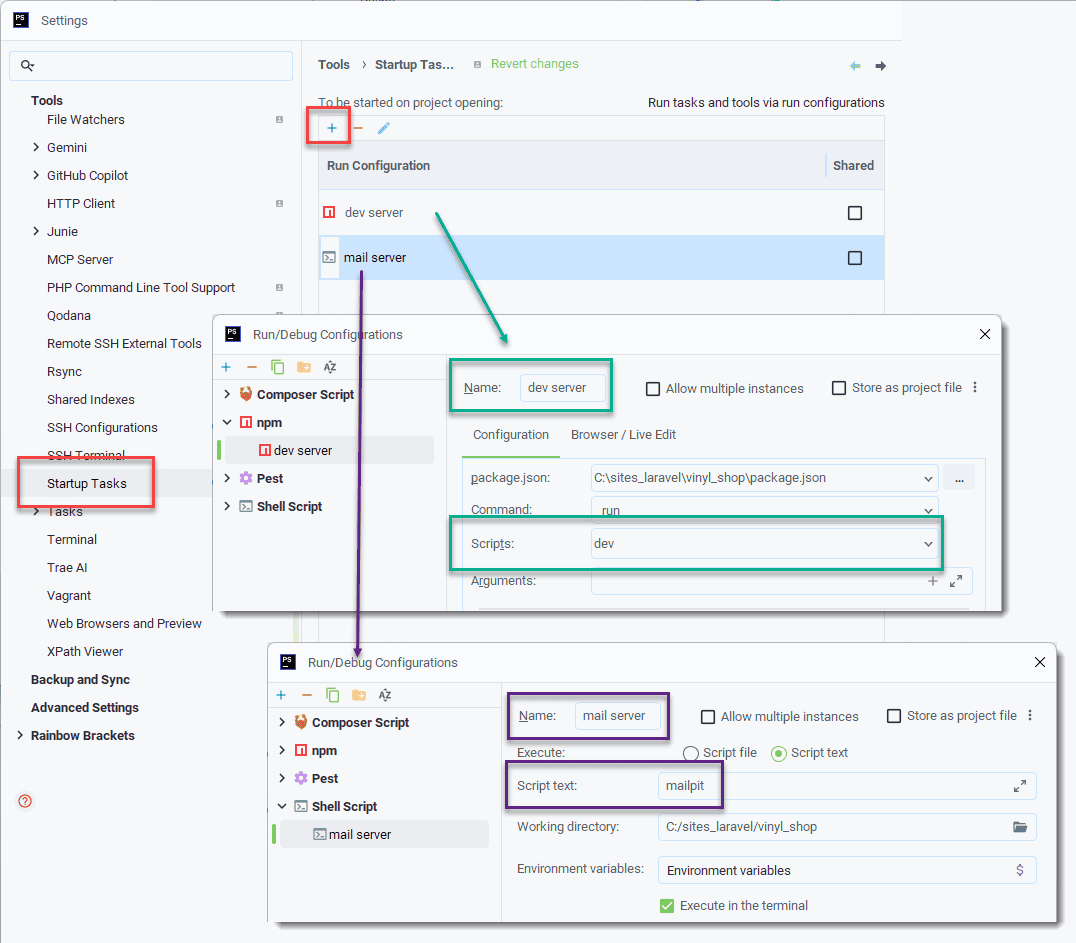
Recommended Chrome Extensions
These browser extensions can help with development and debugging:
- JSON Viewer Pro: Makes JSON responses easy to read.
- Tailwind Devtools: A sidebar for inspecting Tailwind CSS classes.
- Livewire Devtools: Essential for debugging Livewire applications.
- Fake Filler: Quickly fills forms with dummy data.
Project Maintenance & Future-Proofing
Finally, here are some tips for the long-term health and maintenance of your project.
Keep your Laravel project up-to-date
The Laravel framework receives weekly updates with bug fixes and security patches. To update your project to the latest 12.x.x version, run the following command in your terminal:
sh
composer updateFuture Considerations
WARNING
When Laravel 13 is released, the installer will be updated to create only new Laravel 13 projects. If you want to continue creating Laravel 12 projects in the future, it is recommended to create a clean Laravel 12 project now. Keep this project up-to-date with composer update and store it safely on your computer or in a cloud service like GitHub to use as a template.