Appearance
Basic Routing & Views in Laravel
This chapter introduces the fundamental concepts of routing and views within the Laravel framework.
We'll explore how to define routes, create basic Blade views, pass data to those views, and organize routes using groups and names.
Understanding Routing
Routing is the process of defining the URLs of your application and mapping them to specific actions. In Laravel, all web-accessible routes are defined in the routes/web.php file. This file acts as a central directory for all the entry points into your application that users can access through their browser.
The Default Route
When you first install Laravel, the default route (/) is configured to display the 'welcome' view. This is the homepage that users see when they access the root URL of your application (e.g., https://vinyl_shop.test).
php
Route::get('/', function () {
    return view('welcome');
})->name('home');
1
2
3
2
3
The above code snippet demonstrates a few key concepts:
Route::get('/', ...): This defines a route that responds to GET requests to the root URL (/).Routeis a facade, a special Laravel class providing simplified access to underlying functionality.
Behind the scenes,Route::get()interacts with the\vendor\laravel\framework\src\Illuminate\Routing\Router.phpclass. Facades are a core part of Laravel's architecture, but a deep understanding isn't necessary for this course. Think of them as proxies that make calling methods easier.function () { ... }: This is a closure, an anonymous function that executes when the route is matched.return view('welcome');: This line uses theview()helper function to return the 'welcome' view. Helper functions are built-in Laravel functions that simplify common tasks. Theview()function locates and renders a Blade template.->name('home');: This method assigns the name to the defined route for later easy access to it.
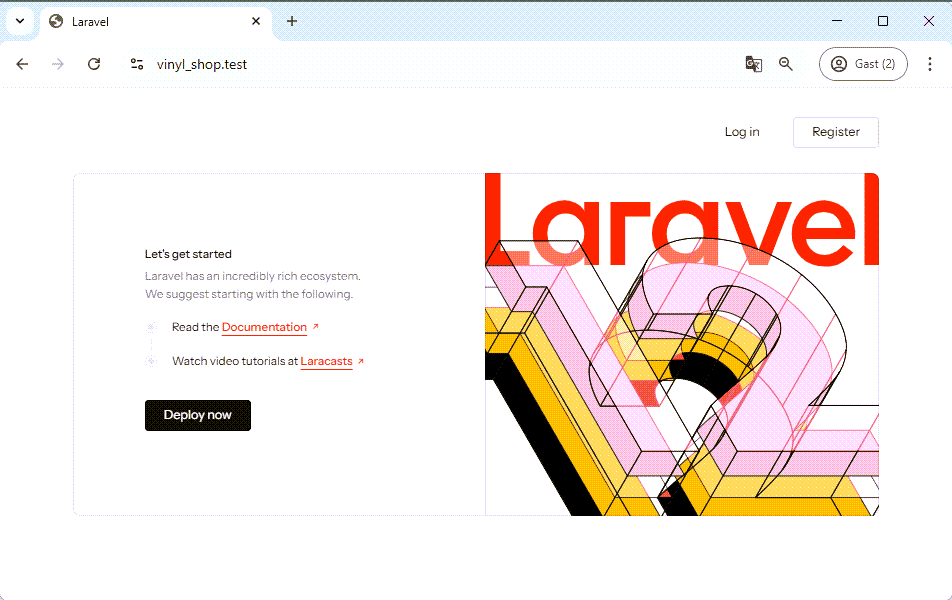
The initial Laravel welcome page looks like this:
Modifying the Home Route
Let's change the homepage to display a simple text message. Modify the closure in routes/web.php to return a string instead of a view:
php
Route::get('/', function () {
    //return view('welcome');       // Comment out the original line
    return 'The Vinyl Shop';        // Return a string instead
})->name('home');
1
2
3
4
2
3
4
Now, visiting the root URL displays "The Vinyl Shop":
Adding a New Route: contact information
To add a contact page, define a new route in routes/web.php that maps to the URL /contact.
php
Route::get('contact', function () {
    return 'Contact info';
})->name('contact');
1
2
3
2
3
This code defines a new route that responds to GET requests to /contact. The closure returns a simple string. The route is also assigned the name 'contact'.
Visiting https://vinyl_shop.test/contact will now display "Contact info":
Working with Blade Views
Instead of returning simple strings, most routes will return views. Views are responsible for presenting the HTML content of your application. Laravel uses a powerful templating engine called Blade.
Blade View Basics
- Blade views are stored in the
resources/viewsdirectory. - All Blade view files must have the
.blade.phpextension. This is a mandatory naming convention. - The Blade template engine provides a clean and expressive syntax for combining HTML with PHP logic. This will be covered extensively later.
Creating a Contact View
Let's create a Blade view for our contact page. Create a new file named contact.blade.php in the resources/views directory with the following HTML:
html
<h1>Contact info</h1>

<p>The Vinyl Shop</p>
<p><a href="mailto:info@thevinylshop.com">info@thevinylshop.com</a></p>
1
2
3
4
2
3
4
Now, update the 'contact' route in routes/web.php to return this view:
php
Route::get('contact', function () {
    // return 'Contact info';      // Replace the string
    return view('contact');        // Return the 'contact' view
})->name('contact');
1
2
3
4
2
3
4
NOTE
view('contact')refers toresources/views/contact.blade.phpview('abc.xyz')refers toresources/views/abc/xyz.blade.php(folders are separated by dots)view('abc.def.xyz')refers toresources/views/abc/def/xyz.blade.php
Now, visiting /contact will render the HTML from contact.blade.php:

Single-Line View Notation
For simple routes that only return a view, Laravel provides a more concise syntax:
php
// Replace the contact route with a single-line view notation
// Route::get('contact', function () {      // Comment out the original route
//     return view('contact');
// })->name('contact');

Route::view('contact', 'contact')->name('contact');     // Use the single-line view notation
1
2
3
4
5
6
2
3
4
5
6
Route::view() directly maps a URL to a view, making the code cleaner and more readable.
Refactoring the Home Page
Let's create a Blade view for the home page as well. Create resources/views/home.blade.php:
html
<h1>The Vinyl Shop</h1>

<p>Welcome to the website of The Vinyl Shop, a large online store with lots of (classic) vinyl records.</p>
1
2
3
2
3
And update the home route in routes/web.php using the single-line notation:
php
// Route::get('/', function () {
    // return 'The Vinyl Shop';
// })->name('home');
Route::view('/', 'home')->name('home');
Route::view('contact', 'contact')->name('contact');
1
2
3
4
5
2
3
4
5
Now the homepage renders the new home.blade.php view:

Organizing Views with Subfolders
It's good practice to organize views into subfolders within resources/views, especially for larger projects. For example, let's create a view for a records listing within an admin section.
Create a new folder admin/records inside resources/views. Then, create a new view file index.blade.php inside the admin/records folder:
Add the following content to resources/views/admin/records/index.blade.php:
html
<h1>Records</h1>

<ul>
    <li>Record 1</li>
    <li>Record 2</li>
    <li>Record 3</li>
</ul>
1
2
3
4
5
6
7
2
3
4
5
6
7
Now, create a route for this view in routes/web.php.
php
Route::view('/', 'home')->name('home');
Route::view('contact', 'contact')->name('contact');

Route::get('admin/records', function (){
    return view('admin.records.index');
})->name('records');
1
2
3
4
5
6
2
3
4
5
6
TIP
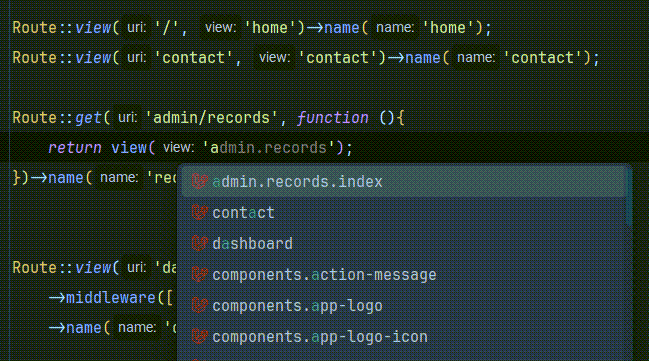
Inside the view() function's string parameter, pressing Ctrl + Space will show a list of available views, making it easier to select the correct one.
Accessing https://vinyl_shop.test/admin/records will now display the records list:

NOTE
We're using the Route::get() notation here because we'll be passing data to this view shortly. The single-line Route::view() notation doesn't allow for passing data.
Passing Data to Views
Routes often need to pass data to views. Laravel provides a simple way to do this using an associative array as the second argument to the view() function.
Passing an Array
Let's pass an array of records to our admin/records view. Modify the route in routes/web.php:
php
Route::get('admin/records', function (){
    $records = [                            // Define an array of records
        'Queen - Greatest Hits',
        'The Rolling Stones - Sticky Fingers',
        'The Beatles - Abbey Road'
    ];

    return view('admin.records.index', [
        'records' => $records  // Pass the $records array with the key 'records'
    ]);
})->name('records');
1
2
3
4
5
6
7
8
9
10
11
2
3
4
5
6
7
8
9
10
11
In the admin.records.index view, you can now access the data using the key of the associative array ('records' in this case):
php
<h1>Records</h1>

<ul>
    <?php
        foreach ($records as $record){
            echo "<li> $record </li>";  // or: echo '<li>' . $record . '</li>';
        }
    ?>
</ul>
1
2
3
4
5
6
7
8
9
2
3
4
5
6
7
8
9
Now, the records are displayed dynamically:

REMARK
The key you use in the associative array is the variable name you'll use in the view. If you changed the key to, for instance, 'someSillyName', you would access the data in the view using $someSillyName.
Using the compact() Function
A more concise way to pass data to views is using PHP's compact() function. compact() creates an associative array from variable names:
php
// Instead of:
// return view('admin.records.index', [
//     'records' => $records
// ]);

// Use compact():
return view('admin.records.index', compact('records'));
1
2
3
4
5
6
7
2
3
4
5
6
7
TIP
compact('records') is equivalent to ['records' => $records]. This is the preferred method in this course for passing data to a view.
Simplifying with Blade Syntax
Blade provides a cleaner syntax for working with PHP code within views.
Replace the PHP foreach loop in index.blade.php with Blade's @foreach directive and the echo ... statement with Blade's {{ ... }}syntax:
php
<h1>Records</h1>

<ul>
    @foreach ($records as $record)
        <li>{{ $record }}</li>
    @endforeach
</ul>
1
2
3
4
5
6
7
2
3
4
5
6
7
Key features of Blade syntax:
- Blade directives always start with
@. @foreachreplaces the PHPforeachloop.@endforeachmarks the end of the loop (no curly braces{}).{{ $record }}is Blade's syntax for outputting data.
The double curly braces automatically escape the output, preventing cross-site scripting (XSS) vulnerabilities.
XSS is a security vulnerability where malicious scripts are injected into web pages. Blade's{{ }}syntax automatically escapes output to prevent this.
XSS Prevention
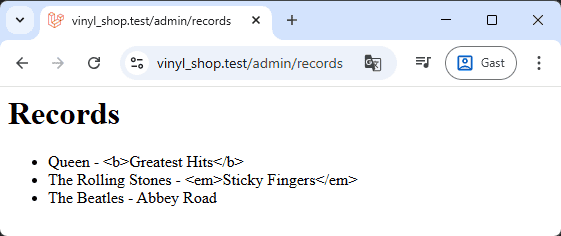
If your data contains HTML tags, Blade's {{ }} will automatically escape them. For example:
php
$records = [
    'Queen - <b>Greatest Hits</b>',     // Contains HTML tags
    'The Rolling Stones - <em>Sticky Fingers</em>',
    'The Beatles - Abbey Road'
];
1
2
3
4
5
2
3
4
5
php
@foreach ($records as $record)
    <li>{{ $record }}</li>
@endforeach
1
2
3
2
3
Output:
If you need to output raw, unescaped HTML (which should be done with caution), use {!! !!}:
php
@foreach ($records as $record)
    <li>{!! $record !!}</li>
@endforeach
1
2
3
2
3
Output:
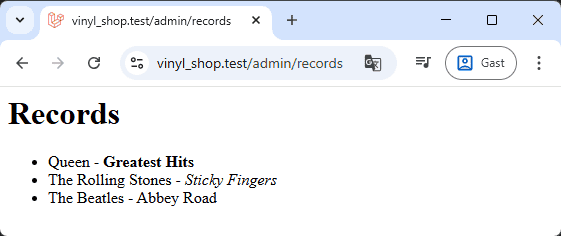
Route::view() vs Route::get()
- Use
Route::view()for routes that only return a view, as it simplifies the code. - Use
Route::get()when you need to execute logic inside the function before passing data to the view.
Route Groups
Route groups are used to apply attributes, like prefixes, to a set of routes. This helps organize your routes and avoid repetition.
Using the prefix() method
The prefix() method adds a string to the beginning of all routes within a group. Let's group all our /admin routes:
php
// Old version
Route::get('admin/records', function (){...})->name('records');

// New version with prefix() and group()
Route::prefix('admin')->group(function () {
    Route::get('records', function (){
        $records = [
            'Queen - Greatest Hits',
            'The Rolling Stones - Sticky Fingers',
            'The Beatles - Abbey Road'
        ];
        return view('admin.records.index', [
            'records' => $records
        ]);
    })->name('admin.records');
});
1
2
3
4
5
6
7
8
9
10
11
12
13
14
15
16
2
3
4
5
6
7
8
9
10
11
12
13
14
15
16
This code groups the records route under the /admin prefix. The full URL remains https://vinyl_shop.test/admin/records.
IMPORTANT
Accessing /admin/ or /admin directly will now result in a 404 error because those routes are not explicitly defined.
You can fix this by adding a redirect inside the admin group:
php
Route::prefix('admin')->group(function () {
    Route::redirect('/', '/admin/records');  // Redirect /admin to /admin/records
    Route::get('records', function (){...});
});
1
2
3
4
2
3
4
Named Routes
Named routes provide a convenient way to refer to routes when generating URLs or redirects. Instead of hardcoding URLs, you can use the route's name to link to the associated URL.
Assigning Route Names
Use the name() method to assign a name to a route. All our routes, except the redirect, already have names:
Unnamed Routes (not recommended)
php
// unnamed route (not recommended)
Route::view('/', 'home');
Route::view('contact', 'contact');

Route::prefix('admin')->group(function () {
    Route::redirect('/', '/admin/records');
    Route::get('records', function (){ ... });
});
1
2
3
4
5
6
7
8
2
3
4
5
6
7
8
Named Routes (recommended)
php
// named route (recommended)
Route::view('/', 'home')->name('home');
Route::view('contact', 'contact')->name('contact');

Route::prefix('admin')->group(function () {
    Route::redirect('/', '/admin/records');
    Route::get('records', function (){ ... })->name('admin.records');
});
1
2
3
4
5
6
7
8
2
3
4
5
6
7
8
Benefits of Named Routes
Using named routes is strongly recommended. If you need to change a URL, you only need to update the route definition in routes/web.php. Anywhere you've used the route name will automatically use the updated URL.
For example, to link to the contact page, you can use either the URL or the route name:
php
// link with URL
<a href="/contact">Contact</a>

// link with route name
<a href="{{ route('contact') }}">Contact</a>
1
2
3
4
5
2
3
4
5
If you change the route's URL from /contact to /contact-us, you only need to update the route definition:
php
Route::view('contact-us', 'contact')->name('contact');1
Links using the URL (href="/contact") will break. Links using the route name (href="{{ route('contact') }}") will automatically update to /contact-us. This makes your application much more maintainable. It is considered best practice only to use named routes.
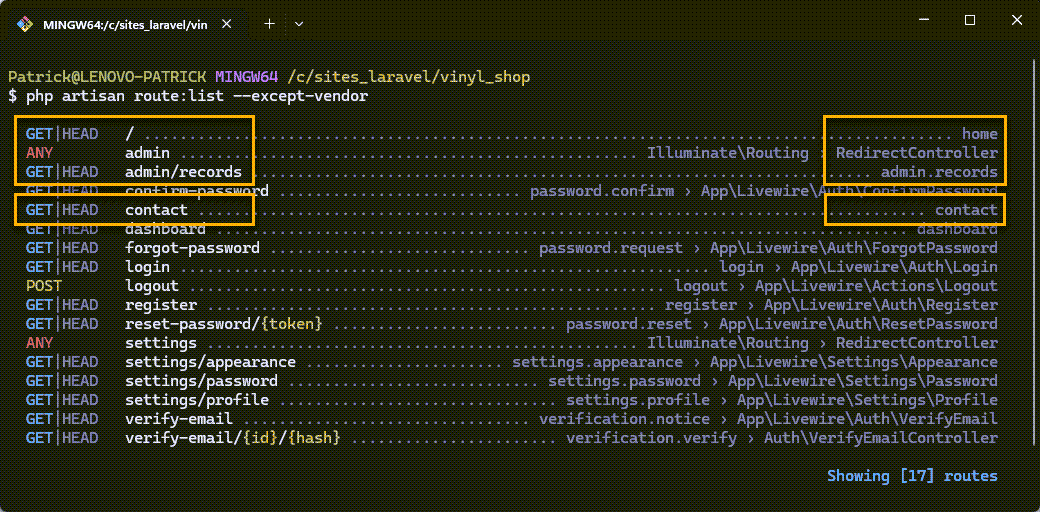
php artisan route:list --except-vendor
You can view a list of all routes in your application using the php artisan route:list command. Use the --except-vendor option to exclude routes from Laravel's vendor packages and only show your application's routes. Besides our routes, you'll see a lot of routes from the Livewire starter kit as well.
