Appearance
Contact Form
This chapter will guide you through creating a functional contact page. We'll build a dynamic contact form using a Livewire component and set up the functionality to send emails. This involves embedding a Livewire component within a standard Blade view, creating a mailable class to define our email structure, and then sending the email upon form submission.
TIP
- We'll use the integrated Mailpit service to send (fake) emails in development and testing environments.
- You can access the Mailpit mailbox in the browser at
http://localhost:8025(or click on the menu in the bottom right corner of the page).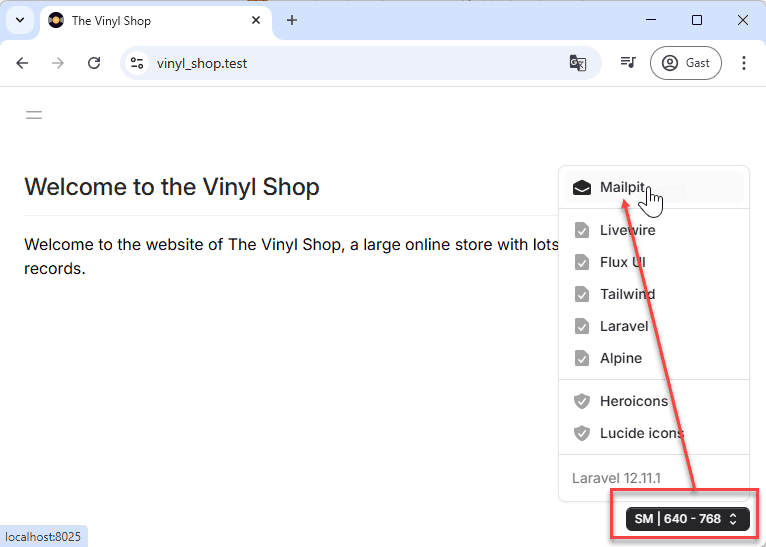
Preparation
Our contact page will feature some static information (like address and phone number) alongside a dynamic contact form. We've already defined a route for /contact in routes/web.php that points to a Blade view: resources/views/contact.blade.php.
We'll update this existing contact.blade.php to include the static content and then embed a new Livewire component for the interactive form. This approach is excellent for pages that have a mix of static content (managed by Blade) and dynamic sections (handled by Livewire), as it allows each technology to do what it does best.
Create a ContactForm Component
First, let's generate the Livewire component that will manage our contact form.
- Open your terminal in the project directory.
- Execute the following Artisan command:bash
php artisan livewire:make ContactForm
This command creates two key files:
app/Livewire/ContactForm.php: The PHP class for our component. This is where we'll handle form input, validation, and the logic for sending emails.resources/views/livewire/contact-form.blade.php: The Blade view for our component. This will contain the HTML structure of the contact form itself.
Now, let's update the main contact.blade.php view to include our static information and embed the newly created ContactForm Livewire component using the @livewire Blade directive.
The livewire/contact-form.blade.php view will contain the form fields. We'll use Flux components for the input fields (flux:input, flux:textarea) and the submit button (flux:button). Each input field is bound to a public property in the ContactForm component class using wire:model.live.debounce to create a two-way data binding with real-time validation.
In the ContactForm.php class, we'll define public properties corresponding to each form field ($name, $email, $subject, $message). We'll use Livewire's attribute-based validation (#[Validate]) directly on these properties to define the rules (e.g., required, min:3, email).
- Replace the entire content of this page with the following code:
- The page contains some static content and embeds the Livewire
ContactFormcomponent using the@livewire('contact-form')directive.
php
<x-layouts.vinylshop
    title="Contact Info"
    description="Contact info for The Vinyl Shop">

    <div class="@container max-w-4xl">
        <div class="grid grid-cols-1 @xl:grid-cols-3 gap-4">
            <div class="@xl:col-span-1">
                <flux:heading size="lg">The Vinyl Shop</flux:heading>
                <flux:text class="my-3">
                    Kleinhoefstraat 4<br>
                    2440 Geel - Belgium
                </flux:text>
                <flux:text>
                    <flux:icon.phone-arrow-down-left variant="mini" class="inline-block mr-2"/>
                    +32(0)14/56.23.10<br>
                    <flux:icon.envelope variant="mini" class="inline-block mr-2"/>
                    info@thevinylshop.com
                </flux:text>
            </div>

            <div class="@xl:col-span-2">
                @livewire('contact-form')
            </div>
        </div>
    </div>
</x-layouts.vinylshop>Sending Email
With the form structure and basic component in place, we can now focus on the email sending functionality. This involves configuring Laravel's mail services, creating a template for our email (a "mailable"), and then triggering the email send action from our component.
Create a Markdown Mailable
In Laravel, each type of email your application sends is represented by a "mailable" class. These classes allow you to build your emails using Blade templates and encapsulate the email's data and sending logic. Laravel offers a convenient way to create mailables that use Markdown for their content, which simplifies writing readable and well-formatted emails.
- To create a new mailable class with an associated Markdown view, run the following Artisan command:
bash
php artisan make:mail ContactMail --markdown=emails.contactThis command does two things:
- Creates
app/Mail/ContactMail.php: This is the mailable class itself. We'll configure the email's sender, subject, and pass data to the view from here. - Creates
resources/views/emails/contact.blade.php: This is the Markdown Blade template for the email. It will use Blade's special mail components (like<x-mail::message>) to structure the email content.
Send Your First Email
Let's modify our ContactForm Livewire component to send an email when the form is submitted.
- resources/views/livewire/contact-form.blade.php:
- We'll add a
wire:clickdirective to the "Send Message" button, which will trigger thesendEmail()method in the component when clicked.
- We'll add a
- app/Livewire/ContactForm.php:
- We'll add a
sendEmail()method. This method will be wired to the "Send Message" button in the form view. - First, it calls
$this->validate()to ensure all form fields meet the criteria defined by the#[Validate]attributes. - We then instantiate our new
ContactMailmailable. - The
Illuminate\Mail\Mailables\Addressclass is used to define the recipient's email address and name. - The
Mailfacade (use Mail;) is used to dispatch the email using itsto()andsend()methods. - We'll use the
NotificationsTraitto display a success toast message to the user. - Finally,
$this->reset()will clear all public properties (our form fields) after the email is sent.
- We'll add a
When you submit the form now, Mailpit (accessible at http://localhost:8025) should catch the email. Initially, this email will have:
- From: The address specified in your
.envfile (MAIL_FROM_ADDRESS=info@vinyl_shop.test). - To: The email address entered in the contact form.
- Subject: A default subject, typically derived from the mailable class name (e.g., "Contact Mail").
- Body: The default content from the generated Markdown template.
php
<div class="grid grid-cols-1 @lg:grid-cols-2 gap-4">
    <div>
        <flux:input wire:model.live.debounce="name" label="Name" placeholder="Your name"/>
    </div>
    <div>
        <flux:input wire:model.live.debounce="email" type="email" label="Email" placeholder="Your email"/>
    </div>
    <div class="@lg:col-span-2">
        <flux:input wire:model.live.debounce="subject" label="Subject" placeholder="Your subject"/>
    </div>
    <div class="@lg:col-span-2">
        <flux:textarea wire:model.live.debounce="message" label="Message" placeholder="Your message"/>
    </div>
    <div>
        <flux:button
            wire:click="sendEmail()"        // Add a click event to the button to trigger the sendEmail() method
            variant="primary">
            Send Message
        </flux:button>
    </div>
    <x-itf.livewire-log/>
</div>REMARKS
- You are not limited to the
to()recipients. You can also addcc()andbcc()recipients. - All these methods can handle multiple recipients by accepting an array of addresses or
Addressobjects. - The second parameter (the name) of the
new Address()method is optional. If you only have the email address, you can pass it directly as a string.$to = 'john.doe@example.com';is equivalent to$to = new Address('john.doe@example.com');
- Example:
php
// send email
$template = new ContactMail();
$to_1 = new Address($this->email, $this->name);     // email + name
$to_2 = new Address('user2@example.com');           // email only
$to_3 = 'user3@example.com';                        // email only (same as above)
Mail::to([$to_1, $to_2, $to_3])
    ->cc(['user3@example.com', 'user4@example.com'])
    ->bcc(['user5@example.com', 'user6@example.com'])
->send($template);- Other mail settings like the default
subject,fromaddress, andreplyToaddress can be configured within theContactMailmailable class, specifically in itsenvelope()method.
Pass Data to the Mailable and Update the Mail Template
To make our email more informative, we need to pass the form data (name, email, subject, message) to our ContactMail mailable and then use this data in the email's Markdown template.
app/Livewire/ContactForm.php:
- When instantiating
ContactMail, we'll pass an array of data (containing$this->name,$this->email, etc.) to its constructor.
- When instantiating
app/Mail/ContactMail.php:
- We'll modify the constructor to accept this data array and store it as a public property (e.g.,
public $data). This makes the data automatically available to the email's view.
IMPORTANT: don't forget to add thepublickeyword to the constructor's parameter. Otherwise, it won't be accessible in the envelope! - In the
envelope()method, we can now use this data to set a dynamic subject (e.g.,$this->data['subject']). We can also customize the "from" address here if needed, overriding the default from.env.
- We'll modify the constructor to accept this data array and store it as a public property (e.g.,
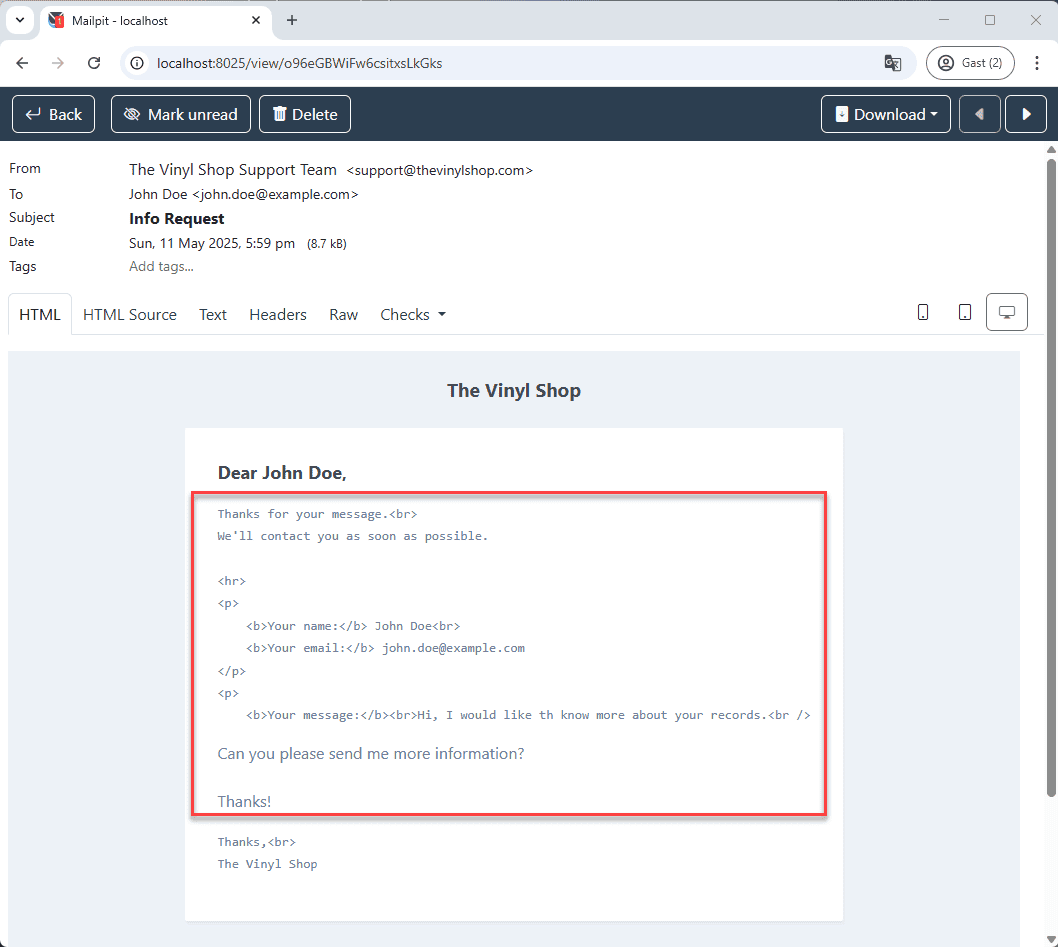
resources/views/emails/contact.blade.php:
- Inside the
<x-mail::message>component, we can now access the passed data using Blade syntax (e.g.,{{ $data['name'] }}). - The
nl2br()PHP function is used for the message body ({!! nl2br($data['message']) !!}) to convert newlines ( from the textarea) into HTML<br>tags, preserving the user's formatting. Note the use of{!! ... !!}to output unescaped HTML.
- Inside the
php
public function sendEmail(): void
{
    $this->validate();

    // Send the Email
    $template = new ContactMail([  // Pass form data to the Mailable's constructor
        'name' => $this->name,
        'email' => $this->email,
        'subject' => $this->subject,
        'message' => $this->message
    ]);
    $to = new Address($this->email, $this->name);
    Mail::to($to)
        ->send($template);

    // Add a toast response
    $this->toastSuccess(
    "<p class='font-bold mb-2'>Dear $this->name,</p>
        <p>Thank you for your message.<br>We'll contact you as soon as possible.</p>");

    // Reset all public properties
    $this->reset();
}MARKDOWN FORMATTING
Don't use indentation for the content within the <x-mail::message> component in your Markdown template. Markdown is sensitive to leading whitespace, and indentation can cause the text to be rendered as a code block or preformatted text in the final email, rather than normally flowed text.
- Good formatting:
md
<x-mail::message>

# Dear {{ $data['name'] }},

Thanks for your message.<br>
We'll contact you as soon as possible.
...
</x-mail::message>- Bad formatting (with indentation):
md
<x-mail::message>
# Dear {{ $data['name'] }},

    Thanks for your message.<br>
    We'll contact you as soon as possible.
    ...

</x-mail::message>- Bad formatting will be rendered as:
Extra Features
- Check Laravel's mail documentation to discover extra mail features, e.g:
- Add attachments to your emails.
- Publish and customize the default mailable Blade components (like
x-mail::message) to change the overall look and feel of your Markdown emails. You can do this with the commandphp artisan vendor:publish --tag=laravel-mail. - Use HTML-based or plain text mail templates if Markdown doesn't suit your needs for a particular email.
- ...
Exercise
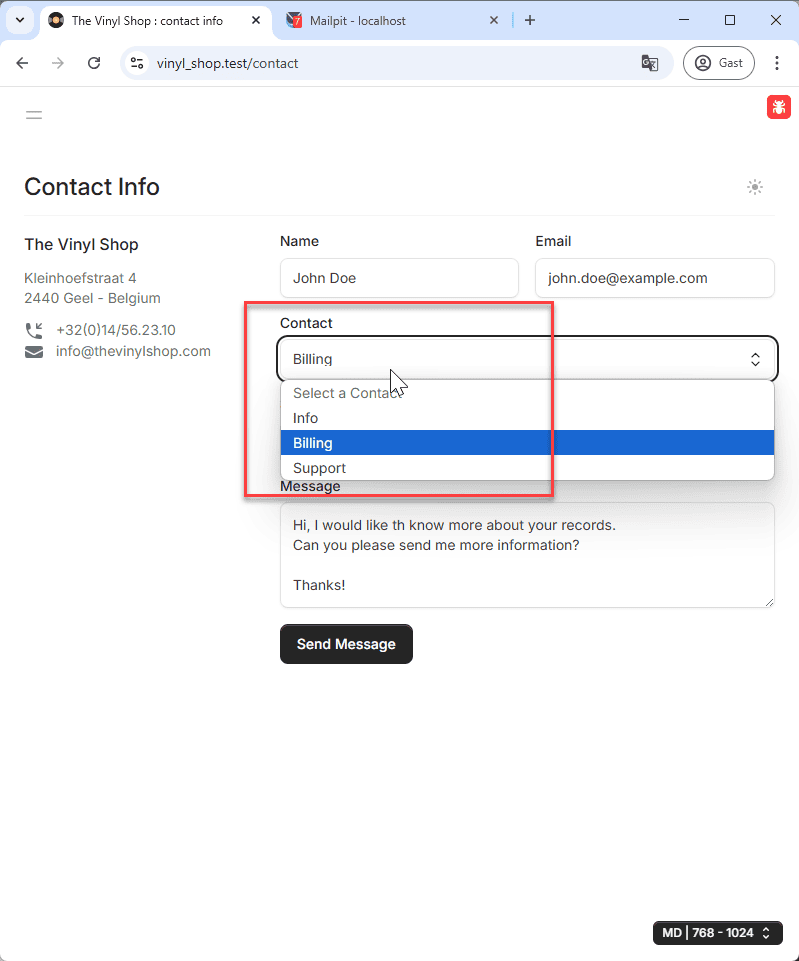
Add a Contact Field to the Form
Let's enhance our contact form by allowing users to select a specific department they wish to contact.
- Add a dropdown list (
<flux:select>) to the form inresources/views/livewire/contact-form.blade.php. This dropdown should allow the user to choose a contact department. - The list should contain four options:
- "Select a contact" (with an empty value
value=""to ensure it's not a valid default selection if the field is required) - "Info"
- "Billing"
- "Support"
- "Select a contact" (with an empty value
- Make this a required field. Add a new public property
$contactDepartmentinapp/Livewire/ContactForm.phpand include appropriate validation rules using the#[Validate]attribute. - Depending on the user's choice in this new dropdown, the
fromaddress in the email sent (configured inapp/Mail/ContactMail.php) should be adjusted. Thecc(carbon copy) address might also be adjusted if needed, though for this exercise, focus on thefromaddress.- If "Info" is selected:
fromshould beinfo@thevinylshop.comwith the nameThe Vinyl Shop - Info. - If "Billing" is selected:
fromshould bebilling@thevinylshop.comwith the nameThe Vinyl Shop - Billing. - If "Support" is selected:
fromshould besupport@thevinylshop.comwith the nameThe Vinyl Shop - Support.
- If "Info" is selected: